The Complete Guide to Installing Grab Bars in Your Bathroom
- Aug 11, 2020
- 3 min read
Updated: Nov 27, 2024

Over the years, we’ve seen some precariously installed grab bars. From not being mounted into studs or using the proper anchoring systems, to placement in some locations that truly boggles the mind! I’m sure they were installed with the best of intentions, but sometimes good intentions can cause a lot of harm. When you put your trust into something to support your weight and prevent falls - it has to work.
We suggest that you hire a professional for installations, like BuildAble, but just in case - here are a few things to consider when adding grab bars to your bathroom.

THE PLACEMENT OF GRAB BARS
The Ontario Building Code and Canadian Standards Association (CSA) provide specific recommendations on the size, angle and placement of grab bars in various locations around a building. Although these regulations are meant for new builds and commercial spaces, they’re handy guidelines to follow for your home.
That said, we know that what’s meant to work for most homeowners, may not work for YOU. If you have specific transferring needs (from a wheelchair or assistive device), we recommend working with an occupational therapist (OT) to measure transferring heights and positioning of the bars that meet your health and safety needs.
Here are general placement guidelines for different types of bars and uses:
1. For a shower or tub enclosure:
A vertical straight bar (24") at the entrance to your shower/tub, AND
L-Shaped (30" x 30") or Diagonal bar (36") on the back wall.
2. For a toilet:
A horizontal straight bar (18-24") behind the toilet and an L-Shaped bar (30" x 30") on the adjacent wall is recommended.
3. For PT rails (see video below):
PT rails should be installed on one or both sides of the toilet to help with body mechanics. They reduce the strain of twisting or reaching for bars that are behind you and can be flipped up if a caregiver needs to provide assistance. These grab bars are certainly more costly but a fantastic option and a client favourite.
However, no matter where they’re placed, ALL standard grab bars should:
Be non-abrasive, slip-resistant, and have a high tonal contrast
Have a diameter of 35 mm and 40 mm
Withstand a force of 1.3 kN applied in all directions
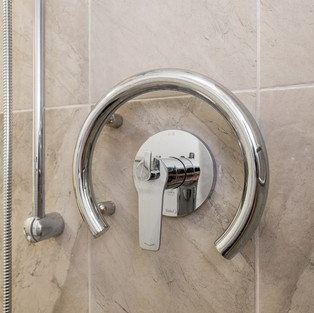
DESIGNER GRAB BARS
Manufacturers are realizing some people don’t want their homes to look like a hospital. Designer grab bars are cleverly disguised as ADA-compliant supports, meaning they meet the standards set by the American Disabilities Act but blend with your bathroom’s interior design. The bars can even be rated to withstand 500lbs of force!
You can check out some of these great products and more here.


INSTALLING GRAB BARS
If you’ve purchased a grab bar and know where to place it, how do you actually install it, if not hiring a professional? Here are a few things to consider before jumping into it.
1. Follow mounting instructions
We can’t say this enough—a grab bar only works if it’s installed properly! All grab bars come with specific mounting directions, so make sure to read these thoroughly. As the gold standard, grab bars are usually mounted into studs using toggle bolts or by properly blocking between the studs before installation. If this practice isn’t followed, the bars will no longer meet their rating capabilities and you’ll likely lose any warranty. Most importantly though, you don't want to compromise on safety.
2. Tile walls
With the proper tools (and skills), grab bars can easily be mounted into or through tile without damage. Quality grab bars will also be watertight to prevent rust from damaging your walls.
3. Acrylic walls
This one depends! If adding grab bars was an afterthought, we recommend that you do not install bars in acrylic tub surrounds because these aren’t flush to the wall and they are designed to flex. However, if new acrylic walls are just being installed in your alcove, this is a good time to install the bars as everything comes together.


Small changes make a big impact!
Grab bars are essential home modifications to help prevent falls and keep your independence. With so many options for style, colour and functional design, there will definitely be bars that work for you.